
In this guide I explain how to disassemble a HP Compaq 6730s – 6735s notebook and remove the cooling fan which is mounted under the motherboard. Basically I will take the whole notebook apart and remove all internal components one by one.
Why wouldn’t HP make a door for the cooling fan? Why should it be so complicated to replace the cooling fan?
Let’s start to disassemble the notebook.
STEP 1.
Remove the battery.
Remove covers from the hard drive, wireless card and memory.

STEP 2.
Remove one screw securing the DVD drive (red circle) and pull the drive from the notebook.
Remove memory modules (in my laptop I had only one module installed).
Remove the hard drive, you’ll find details instruction on the sticker glued to the hard drive caddy.
Unsnap two antenna cables from the wireless card. Remove two screws securing the wireless card (green circles). Remove the wireless card.

STEP 3.
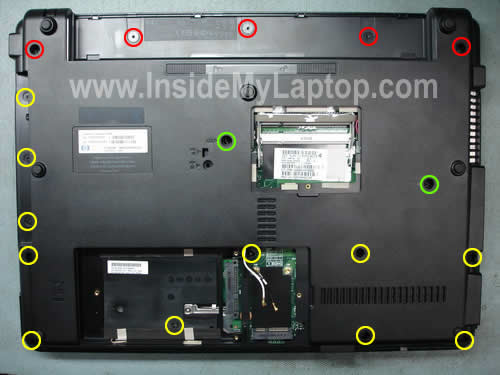
Remove five screws securing the switch board cover (red circles).
Remove two screws securing the laptop keyboard (green circles).
Remove eleven screws securing the laptop bottom cover (yellow circles).
STEP 4.
Lift up the switch board cover. You can separate the switch board cover from the bottom cover with a piece of soft plastic. I’m using a guitar pick.
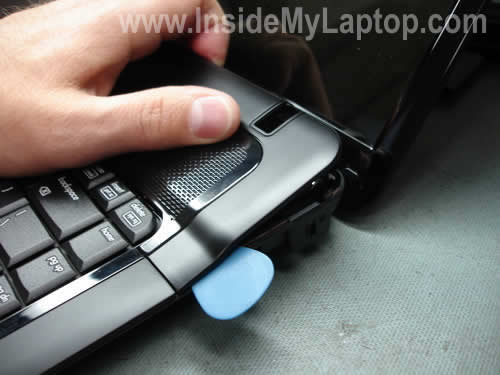
Be careful, the switch board cover is attached to the motherboard. Do not pull the cable from the connector yet.
STEP 5.
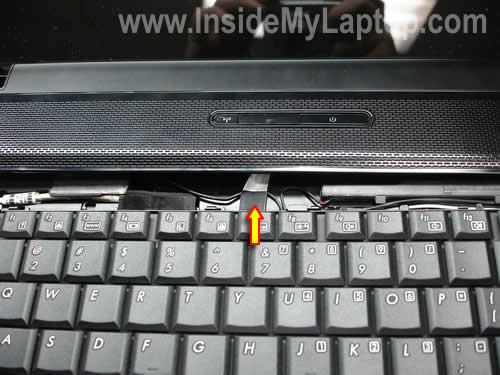
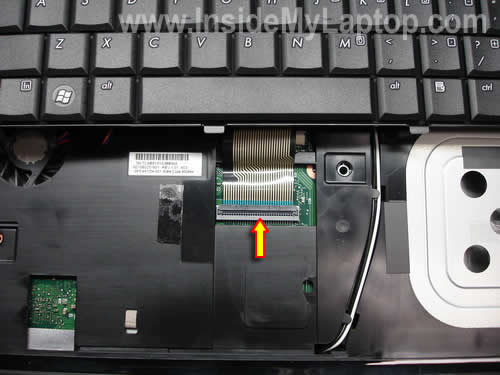
Lift up the keyboard and place it on the switch board cover so you can access the keyboard cable connector.
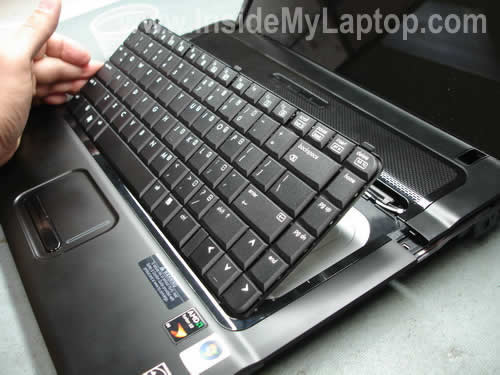
The keyboard is connected to the motherboard via a flat ribbon cable. Before you pull the cable and remove the keyboard, you’ll have to unlock the connector.
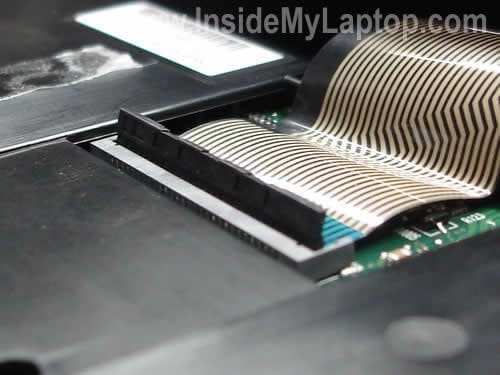
On the picture below you can see the keyboard connector unlocked. Now you can pull the cable and remove the keyboard.
STEP 6.
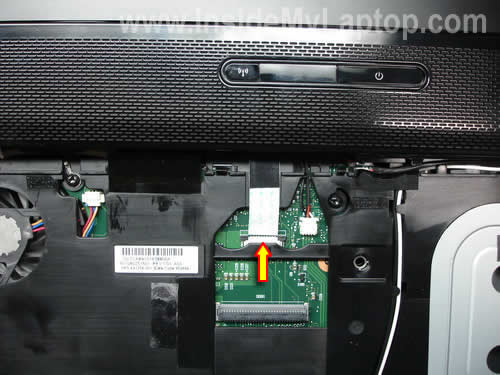
After the keyboard has been removed, you can release the switch board cable and remove the cover.
STEP 7.
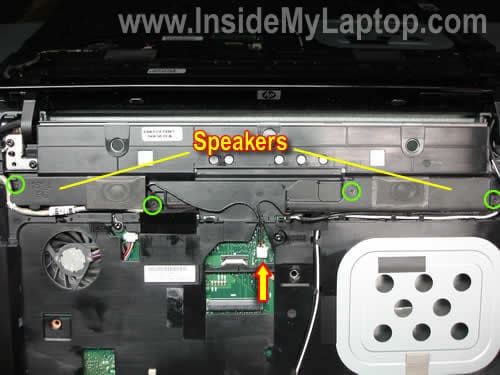
Remove four screws securing the notebook speakers.
Unplug the speaker cable from the motherboard.
Remove both speakers.
STEP 8.
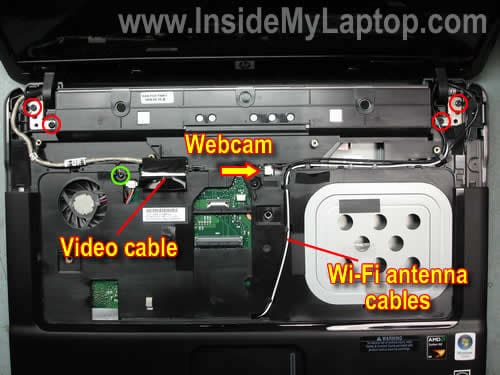
Release the wireless card antenna cables.
Unplug the webcam cable from the motherboard.
Remove four screws securing the display hinges (red circles) and one screw grounding the video cable (green circle).
STEP 9.
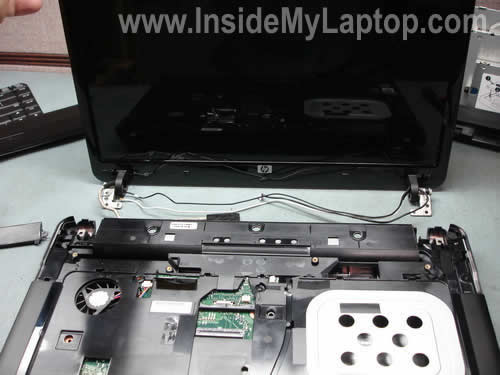
Lift up and remove the display panel assembly.
In the next guide I’ll explain how to get inside the display panel and remove/replace the web camera module.
STEP 10.
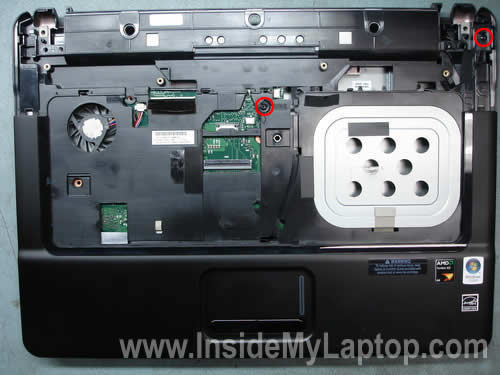
Remove two screws securing the top cover assembly.
STEP 11.
Carefully lift up the top cover assembly.
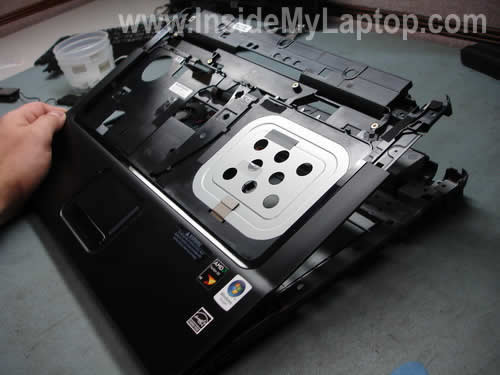
Be careful, the touch pad cable is still attached to the motherboard.Release the touch pad cable and remove the top cover assembly.
STEP 12.
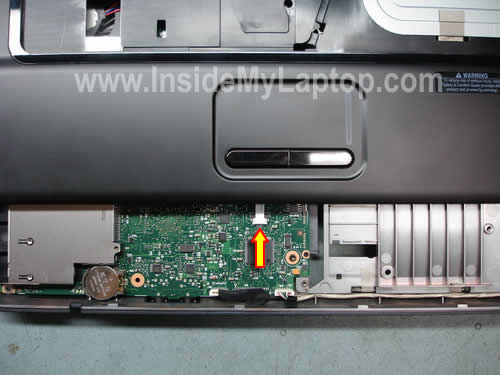
Now we can access the motherboard.
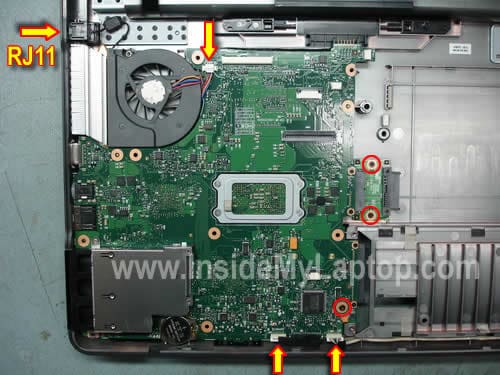
Unplug three cables pointed with arrows.
Remove three screws securing the motherboard.
Lift up and release the RJ11 (modem) jack.
STEP 13.
Start removing the motherboard from the laptop case.
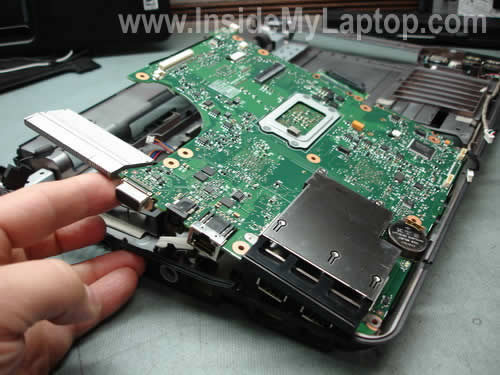
The motherboard has been removed.
STEP 14.
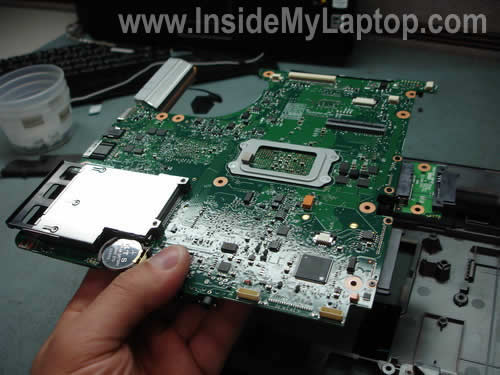
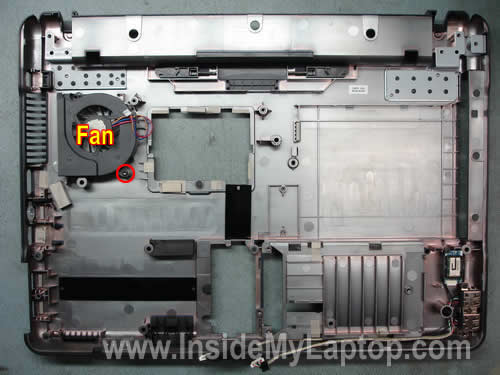
Finally, you can access and replace the cooling fan.
Simply remove one screw securing the cooling fan to the laptop base and replace it with a new one if needed.
If you are replacing the motherboard you’ll have to transfer some parts to the new board.
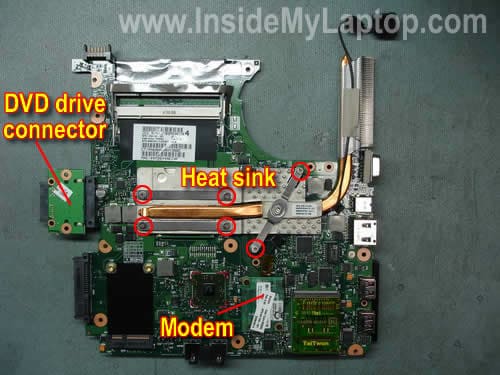
Transfer the DVD drive connector, modem card, heat sink, processor and modem cable.
- See more at: http://www.insidemylaptop.com/disassemble-hp-compaq-6730s-6735s-notebook-remove-cooling-fan/#sthash.s9r1JlPF.dpuf
Izvor: www.insidemylaptop.com/disassemble-hp-compaq-6730s-6735s-notebook-remove-cooling-fan
Nema komentara:
Objavi komentar